Showing posts with label Tutorial. Show all posts

Monday, March 19, 2012

How I Highlight My Face

Hi guys!

This post is going to be about highlighting. At least, this is how I do highlighting. Most of the times I do highlight and contour, even though I don't do harsh contour. Just a little bit to cut my chubby cheeks and to shape my nose, since nose could look a bit flat in picture. However when I don't have enough time, I'd pick highlighting over contouring. It's always easier to accentuate rather than hiding you features.

How I do highlighting is based on video tutorial by Wayne Goss. His technique is more advance and he also include contouring in his tutorial. Click here if you want to watch his. The 'triangle' technique under the eyes is not new though, Kandee Johnson also has a video about it before Wayne posted it. Of course like so many makeup techniques, I learned it and then shaped in a way that feels comfortable for me.

What I use is my MUFE Lift Concealer and Real Techniques Pointed Foundation Brush (or any paddle foundation brush will do). Sometimes I want extra shimmer so I add my theBalm Mary Lou-Manizer highlighter.


  1. I always do highlighting after my foundation. Now, the general rule of thumb is “Cream to cream (or liquid); Powder to powder.” The bottom line is, you want to apply all of your powder products after you apply your liquid or cream products.

  1. The area I work on first is my undereye, as it is the widest area. Using my foundation brush, I start by creating the frame of the triangle and then fill it. As you can see in the picture, I draw the line starting from the inner part of my eyes all the way on the side of my nose. Another line goes from my inner corner of the eyes all the way to the temple. And then draw another line to connect those two lines.

  1. I also add the concealer on other areas that I want to highlight. Like in between my brows, halfway down my nose, on my cupid’s bow and under my lips (marked in white dots). I don’t apply the concealer all over the center part of my forehead as it will give the illusion of wider forehead. As well as on my nose, I don’t drag it all the way to the tip to avoid my nose looking bigger (since I don't do contour here) and oily. The concealer might look a bit too harsh but I give it time to set while I do my eyes. The pink area is where I apply my blush.

  1. As you can see after I did my eyes, the area under my eyes doesn’t look as harsh as before yet the highlight effect still noticeable. This is the step where I apply my powder. But I usually just powder the center part of my face and dust a tiny layer of powder on the undereye area to keep the highlight effect.

  1. As the final step, as I said, I add shimmery highlighter to bring out the area even more. Add lipstick of your choice and you're done!


Other products I used
Chanel Mat Lumiere Foundation
Ben Nye Banana Visage Poudre
MAC Powder Blush 'My Highland Honey'
MAC Eyeshadow 'Cork'
Stila Smudge Pot 'Cobalt'
YSL Rouge Pur Couture Vernis à Lèvres no.9

Saturday, January 14, 2012

Current Eyebrows Routine

Hi guys! This is going to be about my current eyebrows routine. Thought I'll share it with you all.

First of all, let me stress out the importance of shaping your eyebrows! Even if you don't wear a lot of makeup or not interested at all, please take time to shape of your brows. Or maybe trim it, at least. I'm not gonna talk about how eyebrows could change how your face shape looks like, because most of time it's not a very convincing reason and not everybody cares about it. My reason is, well groomed eyebrows gives you a neat appearance. That's all. Who would want to carry around a bunch of bushes above of their eyes? I used to neglect my eyebrows as well. But since I was introduced to threading, that's when the addiction started. I love neat shaped eyebrows and I can't help staring at people's eyebrows first, especially girls with makeup on.

My natural eyebrows shape. Mostly straight.

Eyebrows is one of my makeup basic. Whenever I'm in a hurry, I'd gladly ditch my eyeshadows, eyeliner and even lipstick. But I'll do my foundation, eyebrows and a pinch of blush. My eyebrows routine includes threading, obviously. Waxing is my second option and I almost never shave it. My favorite threading place is Narsih, which is a famous affordable waxing and threading salon in South Jakarta. I love the place because it always gives the best result but I hate that the place is super crowded and I have to queue about thirty minutes almost everytime I visit the place. Anyone know other place to thread eyebrows, please let me know. When I moved for a year to Semarang, I learned to thread my own eyebrows from youtube. I still have professional do my brows but being able to thread my own brows helps A LOT in so many emergency situations. Shape wise, I prefer high-arched eyebrows shape which has nothing to do with my face shape (although it is the right shape for my round face), I just want more space to apply highlight on my browbone. Haha!

I didn't immediately do my makeup routine after my first threading experience. Back then, I thought, having shaped eyebrows means I didn't have to do my brows anymore. Boy how wrong was I?! I didn't realize how washed out my brows looked like back then. I even almost didn't fill my brows when I did my own makeup on my graduation. Thank God my mom told me to! Otherwise I'll have a no-brows look in my graduation pictures.

When I first started to do my brows, I used just eyebrow pencil. I raved about Viva eyebrow pencil before. But the more I was introduced to other products, the more options I had. So now I already picked my favorite products for my routine. And here they are.

Mac 'Cork' satin eyeshadow
Revlon Eyebrow Pencil in Dark Brown
Revlon slanted brush. This is actually not for sale. I got this as GWP. But any slanted brush will do. My point is, it doesn't have to be an expensive brush!
MUFE Khol Pencil in 2K, which is optional.

I prefer MAC Cork and Revlon eyebrow pencil because the color is more neutral and doesn't look too brown when applied. I don't even know how to describe the color on my brows. Not brown, not taupe, definitely not grey! Just enhancing my brows!

Here's the step by step.
  1. This is my bare eyebrows. I prefer to do my eyebrows after I apply my foundation.
  2. Using slanted brush, I fill the beginning of my brows, all the way to the tip of my arch with MAC Cork eyeshadow. I don't fill the tail of my brows with eyeshadows because the tail is too thin.
  3. Using Revlon eyebrow pencil, I line the lower part of my eyebrows. It helps a lot if the pencil was sharp. I start from the beginning all the way to the tail. This is where I determine how long my eyebrow tail should be.
  4. To shape the arch, I use my brush with eyeshadow left on the bristle to blend the eyeshadow on my arch all the way to the tail. (see the difference in pictures no.3 and no.4). Basically, on daily basis or if you're in a hurry, you can stop at this step. But if you want more definition, continue to the next step.
  5. Frame the brows with white eyeliner. I use MUFE Khol Pencil in 2K. And then blend the liner, heading out from your brows. Don't blend into the brows otherwise you'll ruined the color you've applied earlier. This step is to give highlight to your eyebrows.
  6. Done!


So that's my current eyebrows routine. I know it seems like a lot and takes a lot of time. But I love the result and I don't always do the whole steps, anyway. Hope this helps.

Sunday, October 9, 2011

Clean Your Face Using Cleansing Oil

The first time I used cleansing oil is when I was attending Shu Uemura beauty class at the mall. They introduced me to their cleansing oil, which they claimed to be sold for every 20 seconds in Japan, and I was hooked. Seriously, if I could afford buying cleansing oil regularly, I’m not going back to my other cleanser (unfortunately I can’t so I still keep some cleansing milk and other kind of cleansers).

On that beauty class, I was taught on how to use cleansing oil. It’s a bit different than how you use most cleansers but it’s actually really simple. However, some people apparently are not really familiar with the application so I figured I’ll share a step-by-step direction on how to clean your face using cleansing oil.


First is to pump some of the oil to your palm. You can use one or two pumps, depends on how much make up you're wearing. I usually need two pumps when I have waterproof make up on.


Apply cleansing oil directly to your face while dry, with your make up on and everything. I usually start from the area that is the hardest to remove. When I'm wearing waterproof mascara, I usually apply the cleansing oil on my eye first. But it's not necessary, just a habit of mine.


Most cleansing oils are mild and don't sting eyes. Right now I'm currently using MAC cleansing oil and it works fine around the eyes area. Massage your eye area gently. When the waterproof make up comes off, it's gonna smudge all over your eyes and definitely will look dirty but it's fine.


Continue massaging the product all over your face until you can see all of you make up comes off.


Once you have the oil spread all over your face, splash a little amount of water to your face. The oil will turn into a milky consistency. Keep massaging your face and you'll see all the dirt dissolved. You can add more water as you spread it all over you face.


Once you feel all of your make up has been removed from your skin, rinse it. And you're done.

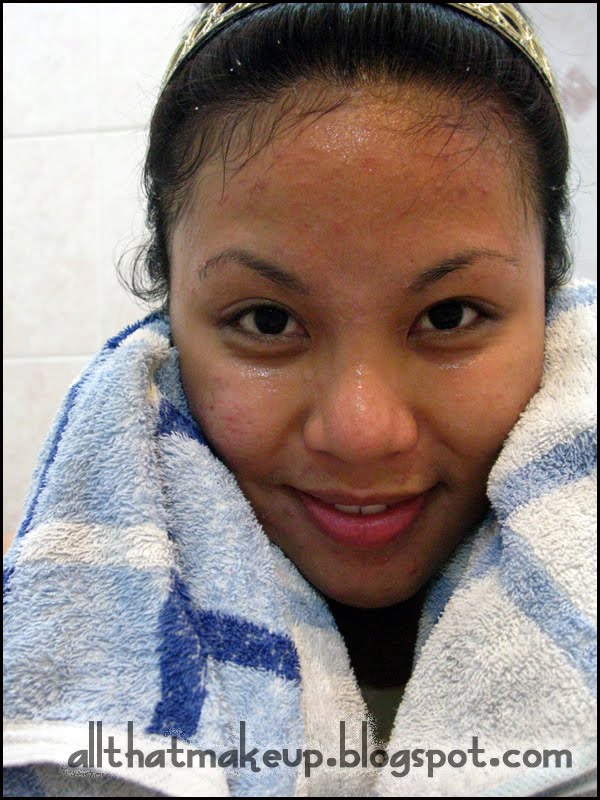
See? Super easy. This step-by-step tutorial might look confusing at first but you'll easily get the hang of it. So far, cleansing oil is my most favorite way to remove my make up. No tugging the skin, you'll need only one product only remove all of your make up, you don't even have to use soap afterward and face feels squeaky clean without feeling dry.

Hope the tutorial helps.

Sunday, August 29, 2010

My Take On Pin Up Look Make Up

It seems like every beauty bloggers and vloggers have their own pin up make look. I figured I'll make one myself too.


Basically, I'm playing with neutral colors for my eyes. And add heavy, winged eyeliner. And of course, it'll never be a pin up look without that bright lips as the center of the attention.

Be sure to check out the tutorial.


Products used.
On eyes.
Revlon Colorstay Concealer
Stila e/s "Kitten"
Urban Decay e/s "Baked"
Urban Decay e/s "Twice Baked"
MAC e/s "Brule"
Urban Decay 24/7 Glide On Eye Pencil "Zero"
MUFE Aqua Eyes 23L
Maybelline Volum' Express Mascara
Lancome Liner Design "Noir Sensuel"
Revlon Eyebrow Pencil "Dark Brown"

On cheeks.
MAC Mineralized Blush "Cheek and Cheerful"

On Lips
CK Lips Definition "Honest"
Revlon Super Lustrous Lipgloss "Cherries In The Glow"
NYX Lips "Snow White"

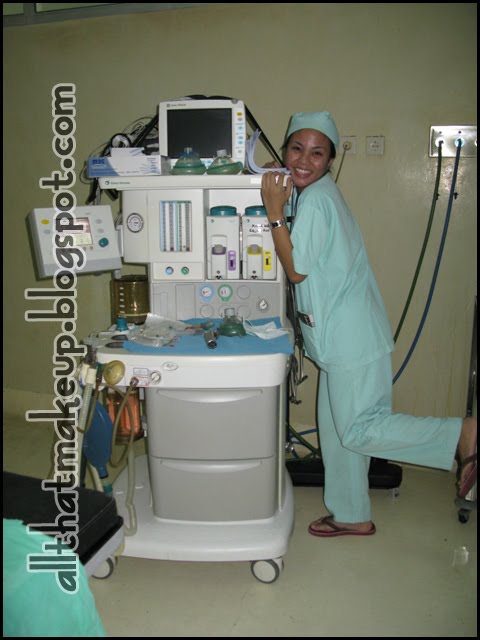
And.. a little bit about me and my life. Life's been pretty hectic for the last couple weeks lately. As you guys probably knew already, I'm studying medical as an co-assistant in the hospital. And last month, I was in the anesthetic cycle, which means, I had to spend every single day for 5 weeks in the surgery room, studying about anesthetic. I was too tired every day. Like, everytime I went home, the only thing I'd want to do is sleep. But, as hectic as it was, I had really great 5 weeks. Altogether with my friends. It was super fun and I found that I actually enjoy spending my days in the surgery room. Weird, huh?

What I do every day, first thing in the morning.
Preparing the premedication drugs.


The Anesthetic Machine
I suppose to put my mask on. EVERYTIME. Where is that, by the way?!

Anyway, now that anesthetic cycle is over. I'm currently in obstetric & gynecology cycle. Since this is one of the major cycles (there are 5 major cycles/ specialties in medical discipline and they are ob/gyn, pediatric, general surgery, internal medicine and family practice) , that means I'll be spending 10 weeks in this cycle, and next Monday would be my third week in this cycle.

I just realized that I don't share that many stories about my life and my school. I just don't wanna bore you with all the stories. But I think it's nice that once in a while you get to know the person behind all those foundations and powders. Well, I hope I could update this blog as often as I could. After all, this is my sweet escape.

PS. In case you're wondering: No, I don't wear make up to the hospital.

Saturday, June 5, 2010

Absolem Look (feat. Alice In Wonderland BOS)

So, here's my first tutorial ever, using my Urban Decay Alice In Wonderland Book of Shadow.


First, apply 'Absolem' allover lid. Make sure you don't go all the way to the crease.

And then, using a pencil brush, take 'Mad Hatter' and apply it on crease. Doesn't have to be neat, though. We'll go back to that color later.

Apply 'Drink Me, Eat Me' on browbone area for highlight.

Back to that 'Mad Hatter' again, now add more color and build it upward. Blending it with the highlight color.

'Jabberwocky' for the outer part of the lid. Drag it upward, an blend it to the outer part of the crease.
Add 'Drink Me, Eat Me' to highlight the tearduct area. And sweep 'Mad Hatter' on the lower lashline, in between the lashes.
In the end, it suppose to look pretty much like this
Look how shimmery all these colors are...

And the final look...

By the way, here's another way to wear this look.


Product used
on face
  • Revlon Photoready Foundation in Medium Beige
  • Revlon Colorstay Concealer in Medium
  • MAC Mineralized Blush in Fab-dabulous
  • Stila Sun Bronzing Powder

on eyes
  • Urban Decay eyeshadow in
  • Absolem (Homegrown)
  • Mad Hatter (Twice Baked)
  • Drink Me, Eat Me (Sin)
  • Jabberwocky (Oil Slick)
  • Urban Decay Liquid Liner in Smog

on lips
  • NYX Round Lipstick in Rea

and for the red lips
  • NYX Lips in Snow White
  • REvlon Super Lustrous Lip Gloss in Cherries In The Glow

Friday, April 23, 2010

Tutorial on My Birthday Look

I know my birthday is sooooo yesterday. But then I remember that I haven't show you the close up of the look I did. So, I decided to do a tutorial as well. 

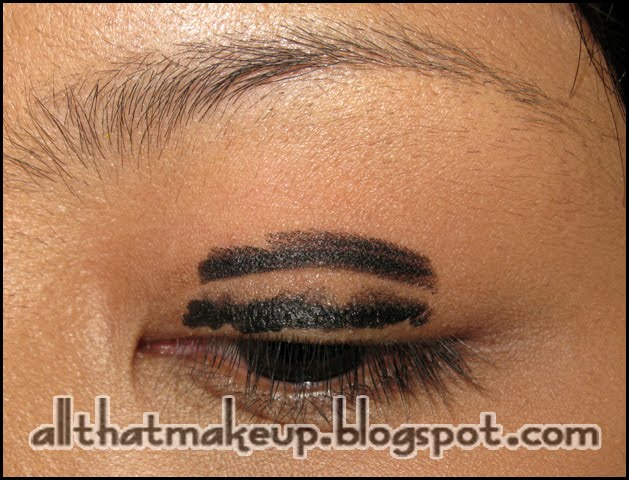
First, I'm gonna need a black base. I use Stila Kajal Liner in 'Onyx'. Apply it on my lid and then blend it. By the way, boyfriend walked in when I was doing this step and he was, like, "Whoa! Is that because we're going to a jail-themed restaurant?!" LOL! 


This is how it looks like after you blend it. Take a little bit of it and blend it upward to the crease


Next, I apply Urban Decay Deluxe eye shadow in 'Underground' on top of 'Onyx'


Apply crease color, which is Urban Decay Deluxe eye shadow in 'Honey'


MAC 'Carbon for the outer corner


Drag 'Carbon' to the outer half of the lower lash line


Don't forget to add eye liner on your upper lash line and lower tight line


And the final look...


Friday, March 19, 2010

Nicole Scherzinger Inspired Makeup

This is a look that is inspired by Nicole Scherzinger make up. I don't know about you, but I've always been a huge fan of her make up. Anyone know who the make up artist is? Is it Troy Jensen?

Anyway, the look that I try to recreate is from one of Pussycat Dolls earliest videos, Beep. In this video, Nicole wears neutral colors on her lid and adds colored eye liner on her lower lash line. Such a simple way to steal people's attention.


Nicole's picture is taken from here

After I applied my primer, I put on MAC 'Rubenesque' Paint Pot all over lid.

MAC 'Brule' over Rubenesque.

Urban Decay 'Underground' on crease.

Urban Decay 'Mad Hatter' (as in 'Twice Baked') on lower lid. Starting from outer two third part of the lid, blend it outward and then go up, blending it with 'Underground'. And then, apply PAC 'White Frost' to highlight browbone and tear duct area.

Apply green eyeliner on lower lashline. Here I'm using Maybelline Expert Eyes in Starry Green. And then add Urban Decay 'Graffiti' over the liner.

Add loads of eyeliner. Curl lashes, add mascara and fake lashes for dramatic effects.


And, voila!

Excuse the silly expression, but this is the only picture that has the right angle and lighting. For the face, I want to achieve that glowy complexion so I swiped a little bit of PAC loose eyeshadow in 'White Frost' on top of my cheek bone, my chin and on the bridge of my nose. MAC powder blush in 'Margin' on the apple of my cheek all the way along the cheek bones.

For lips, I can't find the right shades to matches Nicole's look. I'm looking for nude lipstick with hint of peach. I put NYX Round Lipstick 'Rea' on my lips, but it still has a littlest hint of purple so I mixed it with Revlon Superlustrous lipstick in 'Almost Nude' .

I just recently moved to Semarang. I believe I've told you that before. And I rent a house here (now, that's new). And somehow, God knows why, the owner of the house painted his house green. Seriously, it's green everywhere except for the bathroom. I think the color of the wall affects my camera, in a way it makes every pictures I took without flash appear greenish. Now tell me, is it just me, or this picture looks like it has too much green in it?

So that's my version of Nicole Scherzinger's make up. Unless I have another idea in mind, I'm thinking of wearing this look on my graduation day (which is in May).  I think Urban Decay 'Underground' isn't dark enough for this look. Still looking for the right color. Any suggestions are welcome, dears!